
This guide provides a comprehensive overview of the Viking stove self-cleaning process, ensuring a spotless kitchen with ease. Learn how to use the self-cleaning feature effectively and safely.
1.1 Overview of the Viking Stove Self-Cleaning Feature
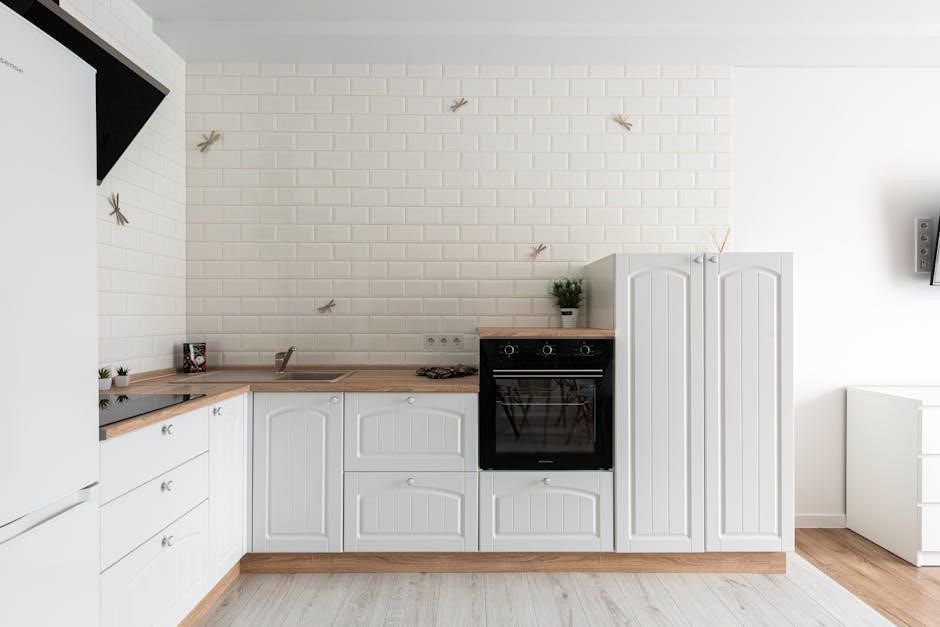
The Viking stove self-cleaning feature is a convenient and efficient way to maintain your oven’s cleanliness. This advanced function uses high temperatures to burn food residue into ash, simplifying the cleaning process. The automatic door latch ensures safety by locking the oven door during the cycle, preventing accidental opening. Once the cycle is complete, the ash can be easily wiped away, leaving the oven spotless. This feature not only saves time but also reduces the need for harsh chemicals, making it a practical solution for homeowners seeking a hassle-free cleaning experience. Regular use of this feature helps maintain the oven’s performance and longevity.
1.2 Benefits of Using the Self-Cleaning Function
Using the Viking stove’s self-cleaning function offers numerous benefits, including efficiency and convenience. The high-temperature cycle eliminates food residue, reducing the need for manual scrubbing. This feature also ensures a safer cleaning process, as the automatic door latch prevents accidental opening during the cycle. Additionally, it removes tough stains and grime without harsh chemicals, maintaining the oven’s interior. Regular use of the self-cleaning function helps preserve the stove’s performance and extends its lifespan. By simplifying maintenance, this feature allows homeowners to enjoy a cleaner, more efficient kitchen with minimal effort. It’s a practical solution for keeping your Viking stove in optimal condition.
Understanding the Self-Cleaning Cycle
Understanding the Viking stove’s self-cleaning cycle involves high temperatures that burn food residue to ashes, making cleanup easier. The automatic door latch ensures safety during the process.

2.1 How the Self-Cleaning Cycle Works
The Viking stove’s self-cleaning cycle uses high temperatures to burn food residue into ashes. The process involves setting the oven to a very high temperature, typically around 800°F to 1000°F, for several hours. During this time, the oven door is automatically locked for safety. The intense heat breaks down tough stains and grime, leaving behind a manageable amount of ash. Once the cycle is complete and the oven cools, the ashes can be easily wiped away. This efficient process eliminates the need for harsh chemicals, making it a convenient and effective way to maintain your stove’s cleanliness and performance.
2.2 Preparing Your Viking Stove for Self-Cleaning
Before starting the self-cleaning cycle, ensure your Viking stove is properly prepared. Remove all racks, shelves, and utensils from the oven, as high temperatures may damage them. Protect the floor and surrounding areas with drop cloths or newspaper to catch any ash or debris. Clean the exterior of the stove, including the burners and grates, to prevent food residue from interfering with the cycle. Turn off the stove and allow it to cool completely before initiating the self-cleaning process. This preparation ensures a safe and effective cleaning experience, maximizing the efficiency of the self-cleaning feature.
Preparing the Oven for Self-Cleaning
Remove racks, shelves, and utensils, then protect the floor and surrounding areas. Clean the exterior and ensure the stove is cool before starting the cycle.
3.1 Removing Oven Racks and Shelves
Before starting the self-cleaning cycle, remove all oven racks, shelves, and utensils to prevent damage and ensure proper cleaning. This step is crucial for effective results. Clean these items separately to maintain hygiene and prevent residue buildup. Proper removal ensures the self-cleaning process works efficiently without obstruction. Always handle racks and shelves with care, as they may be heavy or fragile. Store them in a safe place until the cycle is complete and the oven has cooled down. This step ensures a smooth and safe cleaning experience for your Viking stove.
3.2 Protecting the Floor and Surrounding Areas
Protecting the floor and surrounding areas is essential before starting the self-cleaning cycle. Use drop cloths or old sheets to cover the floor and nearby surfaces to prevent ash and residue from spreading. Remove any items that could be damaged by heat or cleaning fumes, such as rugs or curtains. Ensure the area around the stove is clear to avoid accidents. Additionally, consider sealing the space with tape to contain cleaning agents. Proper protection ensures a safe and mess-free cleaning process. This step is crucial for maintaining your kitchen’s cleanliness and preventing damage during the self-cleaning cycle.
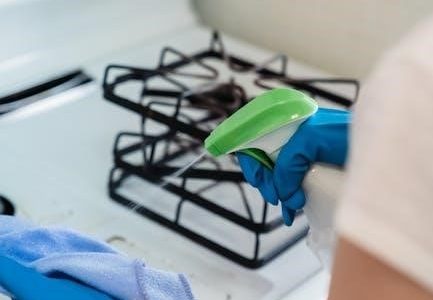
3.3 Cleaning the Exterior Before Starting the Cycle
Cleaning the exterior of your Viking stove before starting the self-cleaning cycle is crucial for maintaining its appearance and functionality. Use a mild detergent and a soft cloth to wipe down the exterior surfaces, paying attention to knobs, handles, and any visible stains. Avoid using abrasive cleaners or scrubbers, as they may damage the finish. For tougher stains, mix equal parts water and white vinegar on a damp cloth and gently scrub the area. Ensure all surfaces are clean and free of grease to prevent smoke or odors during the cycle. A clean exterior enhances the overall cleaning process and keeps your stove looking new.

Running the Self-Cleaning Cycle
Start the self-cleaning cycle by setting the temperature and timer according to your Viking stove’s manual. The automatic door latch ensures safety during the process.
4.1 Starting the Self-Cleaning Cycle

To initiate the self-cleaning cycle, ensure the oven is empty of racks and food debris. Turn the Temperature Control knob to the “Clean” setting and select the desired cleaning time using the oven controls. For models with a digital display, navigate to the cleaning option and set the timer according to the manufacturer’s instructions. Once the settings are confirmed, the automatic door latch will engage, securing the oven door for safety. The stove will begin heating to a high temperature to burn off food residue. Always refer to your Viking stove’s user manual for specific instructions, as settings may vary by model. Proper initialization ensures an effective cleaning process.
4;2 Setting the Temperature and Timer
Setting the temperature and timer is a crucial step in the self-cleaning process. For most Viking stove models, select the “Clean” mode using the oven function selector. Use the Temperature Control knob to set the desired cleaning temperature, typically between 800°F and 900°F. Next, use the timer or digital controls to set the cleaning duration, usually 2 to 4 hours, depending on soil level. Ensure the oven is empty and the racks are removed before starting. Once settings are confirmed, the stove will begin the cycle. Always refer to your specific model’s manual for exact temperature and timer guidelines, as settings may vary. Proper temperature and timer configuration ensures effective cleaning and safety.
4.3 Understanding the Automatic Door Latch
The automatic door latch is a safety feature that engages during the self-cleaning cycle to prevent accidental opening. Once the cycle starts, the latch locks the oven door securely. This ensures no one can open the oven while it’s at high temperatures, reducing the risk of burns or injuries. The latch remains locked until the oven cools down to a safe temperature, typically after the cycle completes and the oven has cooled sufficiently. You cannot manually open the door during this time. This feature is essential for safe operation, as the extreme heat generated during self-cleaning could otherwise pose a hazard. Always wait for the latch to release automatically before accessing the oven.
Monitoring the Self-Cleaning Process
Monitor the self-cleaning cycle by observing the oven’s progress through the window. Ensure safety by keeping the area clear and avoiding overheating. Let the cycle complete fully before opening.
5.1 Checking the Progress of the Cycle
During the self-cleaning cycle, monitor the oven through the window to observe the progress. Ensure the oven remains closed to maintain high temperatures. Avoid interrupting the cycle until it completes, as this may affect cleaning efficiency. The automatic door latch will secure the oven during cleaning, releasing only when it cools down. Keep the area clear of flammable materials and ensure proper ventilation to prevent fumes from spreading. Allow the cycle to run uninterrupted for optimal results. Once complete, let the oven cool before opening to avoid burns or damage. This ensures a safe and effective cleaning process for your Viking stove.
5.2 Ensuring Safety During the Cleaning Process
Always prioritize safety when using the self-cleaning feature on your Viking stove. Keep children and pets away from the oven during the cycle, as the exterior may become extremely hot; Ensure proper ventilation in your kitchen to prevent fumes from accumulating. Never use abrasive cleaners or water during the cycle, as this can damage the oven or cause burns. If you need to interrupt the cycle, turn both the Temperature Control knob and Oven Function selector to OFF. Wait for the oven to cool down completely before opening the door. The automatic door latch will release once the oven is safe to open, ensuring no accidental burns or injuries.
Post-Cleaning Steps
Allow the oven to cool completely before wiping away ashes and residue. Clean racks and shelves separately with mild soap and water for optimal maintenance.
6.1 Allowing the Oven to Cool Down
After the self-cleaning cycle completes, it’s essential to let the oven cool down fully before opening the door. This ensures safety and prevents burns from residual heat. The automatic door latch will release once the oven has cooled to a safe temperature. Avoid rushing this step, as high temperatures can still be hazardous. Keep the kitchen well-ventilated during this time to reduce smoke and fumes. Once the oven is cool to the touch, you can proceed to wipe away ashes and residue. This step is crucial for both safety and effective cleaning. Always prioritize patience to avoid accidents and ensure a thorough cleaning process.
6.2 Wiping Away Ashes and Residue
Once the oven has cooled, use a damp cloth or paper towel to wipe away ashes and residue. This step is most effective while the oven is still slightly warm but not hot. Avoid using abrasive materials that could scratch the surfaces. For tougher spots, a gentle cleanser can be applied, but heavy scrubbing is typically unnecessary after the self-cleaning cycle. Dispose of the residue carefully to prevent spreading ash particles. After wiping, use a clean, damp cloth to remove any remaining streaks or residue. This ensures a clean and polished finish, preparing your Viking stove for its next use.
6.3 Cleaning the Oven Racks and Shelves
After the self-cleaning cycle, remove the racks and shelves from the oven and wash them in warm, soapy water. Use a soft sponge or brush to scrub away food residue. For tough stains, soak the racks and shelves in a mixture of baking soda and water or use a gentle cleanser. Rinse thoroughly and dry with a clean towel before placing them back in the oven. This ensures they are spotless and ready for the next use. Regular cleaning of racks and shelves helps maintain hygiene and prevents stubborn stains from building up over time.

Maintenance Tips for Your Viking Stove
Regular cleaning and inspections ensure optimal performance. Check for food residue, clean burners, and use recommended products to maintain your Viking stove’s efficiency and longevity.
7.1 Regular Cleaning to Maintain Efficiency
Regular cleaning is essential for maintaining your Viking stove’s efficiency. Wipe down surfaces after each use to prevent food residue buildup. Clean burners and grates with mild detergents to ensure proper gas flow and ignition. For tougher stains, mix baking soda and water to create a paste, applying it to affected areas and letting it sit before scrubbing. Avoid harsh chemicals that might damage finishes. Consistent upkeep prevents grime accumulation, ensuring your stove performs optimally and lasts longer. By incorporating these habits, you’ll keep your Viking stove in excellent condition and ready for daily use.
7.2 Deep Cleaning Techniques for Tough Stains
For tough stains on your Viking stove, deep cleaning techniques are necessary. Apply a mixture of equal parts water and white vinegar to stained areas, letting it sit for 30 minutes to loosen grime. For stubborn spots, use a gentle scrubber or non-abrasive sponge to avoid scratching surfaces. Baking soda paste can also be effective—apply it overnight and rinse thoroughly in the morning. Avoid using abrasive cleaners or bleach, as they may damage the stove’s finish. Regular deep cleaning ensures your Viking stove remains in pristine condition, maintaining its performance and aesthetic appeal over time.
Troubleshooting Common Issues
If the self-cleaning cycle fails, ensure the oven is cool, then reset the stove. For error codes, refer to the manual or Viking support for solutions.
8.1 What to Do If the Self-Cleaning Cycle Fails
If the self-cleaning cycle fails, turn both the Temperature Control knob and Oven Function selector to OFF. Allow the oven to cool completely before attempting to open the door. Once the temperature drops to a safe level, the automatic door latch will release. If the issue persists, check the power supply or ensure the door is properly aligned and closed. Resetting the stove may resolve the problem. If the cycle still doesn’t work, consult the user manual or contact Viking customer support for assistance. Avoid forcing the door open, as this could damage the latch mechanism. Always follow safety guidelines to prevent accidents or further malfunctions.
8.2 Resolving Error Codes During the Cycle
If error codes appear during the self-cleaning cycle, refer to your Viking stove’s user manual for specific code meanings. Common issues include power supply problems or improper door alignment. Turn the Temperature Control knob and Oven Function selector to OFF, then wait for the oven to cool. If the error persists, reset the stove by turning the power off and on. For unresolved issues, contact Viking customer support. Avoid forcing the door open, as this could damage the automatic latch. Always follow the manufacturer’s troubleshooting guide to ensure safety and prevent further malfunctions. Proper resolution of error codes ensures optimal performance and extends the appliance’s lifespan;
Additional Tips for a Spotless Kitchen
Use the right cleaning products and natural methods to maintain your Viking stove. Regular cleaning of burners and grates ensures optimal performance and a polished appearance.
9.1 Using the Right Cleaning Products
Using the right cleaning products is essential for maintaining your Viking stove. For the exterior, use gentle stainless steel cleaners to avoid scratches. For the cooktop, opt for non-abrasive cleaners or vinegar solutions. Avoid harsh chemicals like bleach, as they can damage the finish. Always choose products specifically designed for your stove’s surfaces, such as ceramic cooktop cleaners for glass surfaces. For tough stains, consider using a grout pen or specialized stove cleaners. Microfiber cloths are ideal for wiping down surfaces without leaving streaks. Remember to avoid abrasive sponges or scrubbers, as they can scratch the stove. Regular use of the right products ensures a polished appearance and longevity of your appliance.
9.2 Natural Cleaning Methods for Your Viking Stove
Natural cleaning methods are a great way to maintain your Viking stove without harsh chemicals. For the exterior, mix equal parts water and white vinegar in a spray bottle. Apply it to surfaces, let it sit for 10 minutes, then wipe clean with a microfiber cloth. For tougher stains, create a paste with baking soda and water, apply it to the area, and let it sit overnight before rinsing. Avoid abrasive materials like scouring pads, as they can scratch surfaces. Regular natural cleaning helps preserve the stove’s finish and keeps it looking new. These eco-friendly methods are safe and effective for daily maintenance.
Your Viking stove’s self-cleaning feature makes maintenance effortless. By following these steps, you’ll ensure a spotless kitchen and extend your appliance’s lifespan with proper care.
10.1 Summary of the Self-Cleaning Process
The Viking stove self-cleaning process is a convenient and efficient way to maintain your appliance. By using high temperatures, the oven burns food residue, leaving ashes that are easy to wipe away. Before starting, ensure racks and shelves are removed, and the area is protected. Set the temperature and timer, and let the automatic door latch secure the oven for safety. After the cycle, allow the oven to cool, then wipe away ashes and clean racks. Regular cleaning helps maintain efficiency and extends the appliance’s lifespan. Follow these steps for a spotless kitchen and optimal performance.
10.2 Final Tips for Maintaining Your Viking Stove
Regular maintenance is key to extending the life of your Viking stove. Clean up spills immediately to prevent tough stains. Use gentle, non-abrasive cleaners to avoid damaging surfaces. For natural cleaning, mix baking soda and water for a paste, or use vinegar for a streak-free shine. Always refer to your user manual for specific cleaning recommendations. Check for error codes and address them promptly to avoid performance issues. Deep clean grates and burners periodically to ensure optimal functionality. Protect the exterior from splatters and fingerprints for a polished look. By following these tips, you’ll keep your Viking stove in pristine condition and ensure years of reliable service.